Mark a test
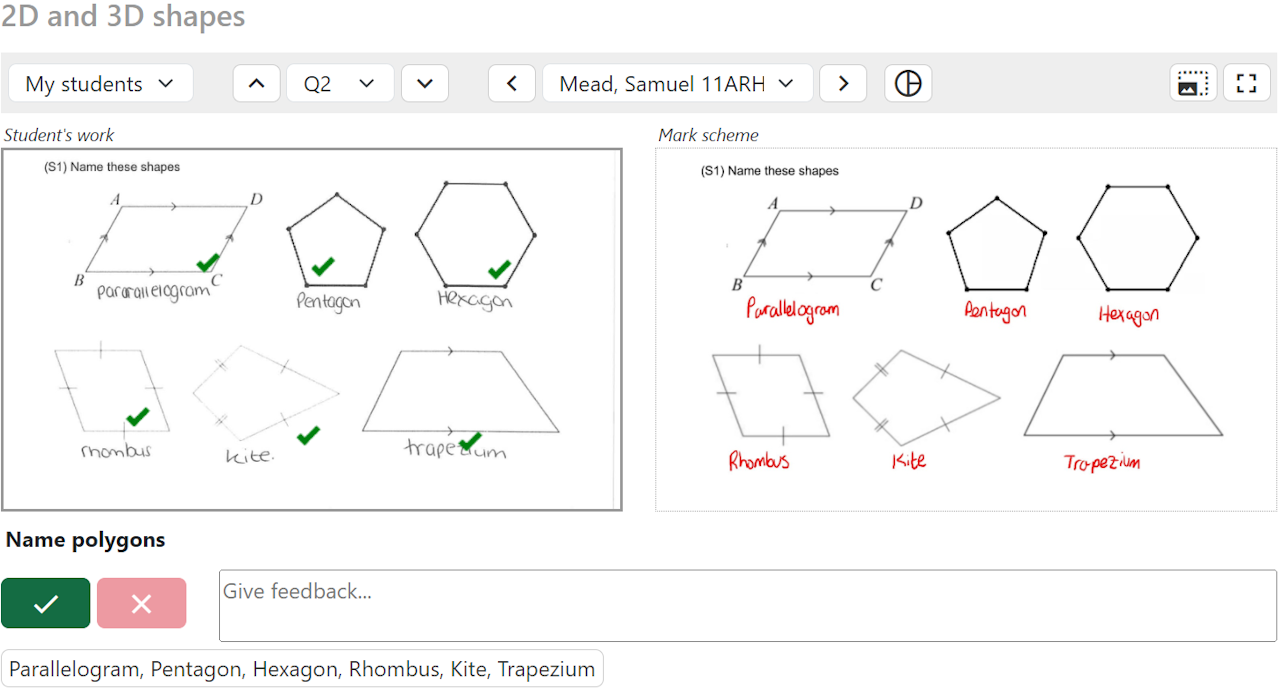
When marking a test, you will see the current student's work on the left and the model answer on the right (if you have uploaded model answers). For each response, you simply need to click the green tick button or red cross button, or press the G/R keys on your keyboard.
You can click anywhere on the student's work to leave a tick. If you click the tick again, it will become a cross. Clicking a third time turns it into a question mark. These annotations are helpful to show a student where in their answer they picked up a mark or made a mistake.
Partially correct answers
MiniTest is designed to be used with this consistent approach:
- Green: The answer is fully correct. Only award this if there are no mistakes.
- Amber: The student fully understands the topic, but has made an unrelated mistake. For example, award this if a student has shown all the right working but made a rounding error at the end or omitted the units of their answer. To indicate Amber, annotate a cross or question mark anywhere on the student work and then press the Green button (which appears as a lighter stripy shade of green). This light green colour is used to emphasise that the student does fully understand. The amber colour only appears on student printouts and emails.
- Red: The student does not fully understand the topic. Award this if an answer is blank, incorrect, or partially correct. If there are multiple parts to a question and the student has got most of them correct but one part wrong, this is still Red because they do not fully understand the topic.
Example 1: The response below should be marked Red because the student has not demonstrated understanding of all parts of the question.
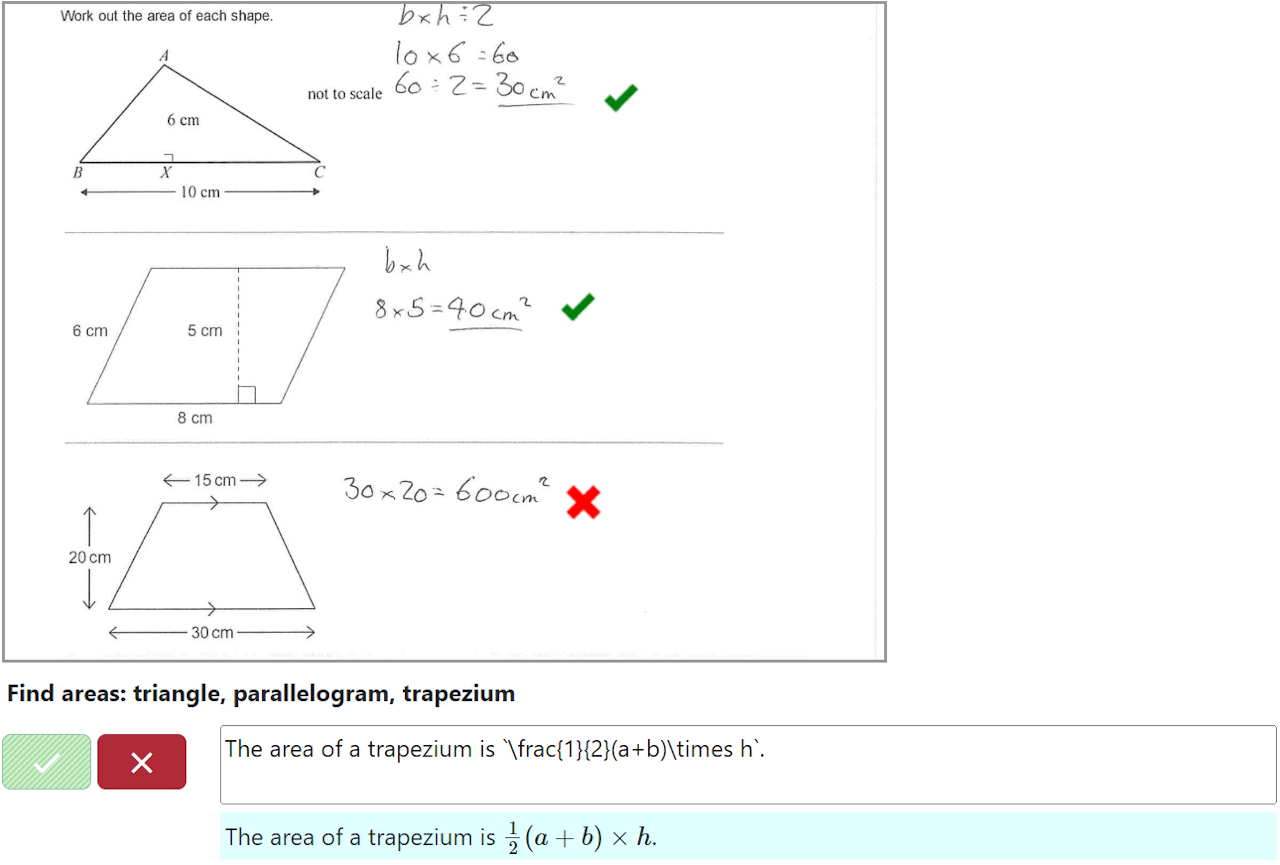
Example 2: The response below should be marked Amber because the student has demonstrated full understanding of both parts, but they have made some unrelated mistakes.

Exam marking
If your test is configured for exam marking, then instead of marking green/red you must award a specific number of marks for each question. To do this, annotate one tick for each mark you want to award and then click the button to confirm the mark. Alternatively, use the 0-9 keys on your keyboard.
Student names are hidden by default, to protect against unconscious bias. You can override this by adding ?showNames=true to the URL.
If you are unsure about exactly how many marks to award, you can click the flag button outlined_flag (or press F). Then when you later come to moderate as a team, you can use the shield button shield to jump to each moderation flag.
Written feedback
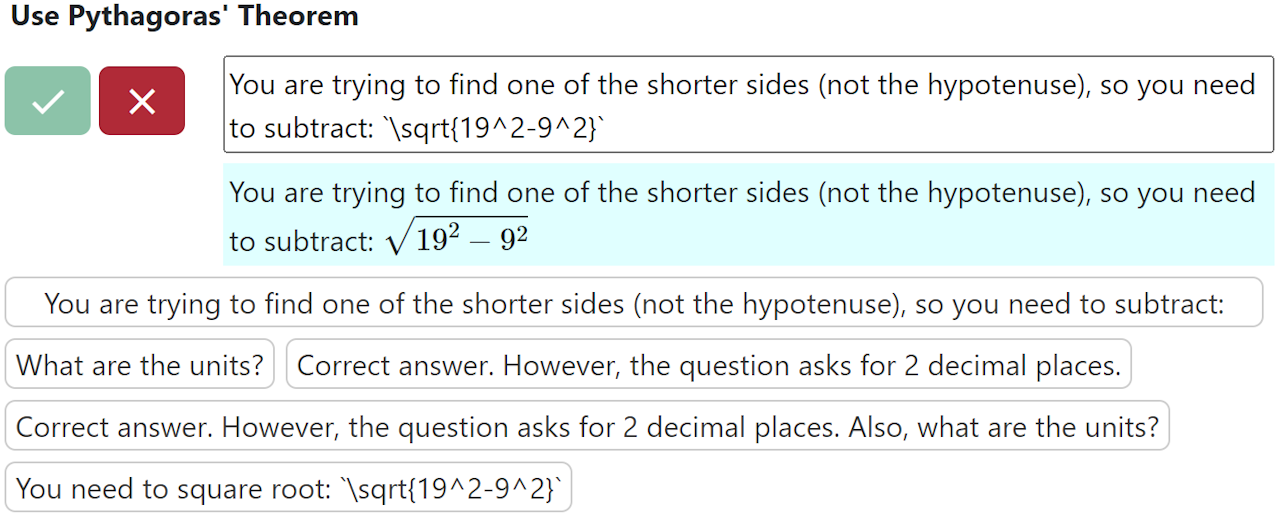
Optionally, you can leave written comments to let students know where they went wrong. These will be shown on the feedback printouts, and also visible to parents if you email the test results home. When you leave a comment for one student, it is automatically saved as a template so you can reuse it for other students. You can use LaTeX within backticks (`) to display mathematical notation such as fractions and square roots.
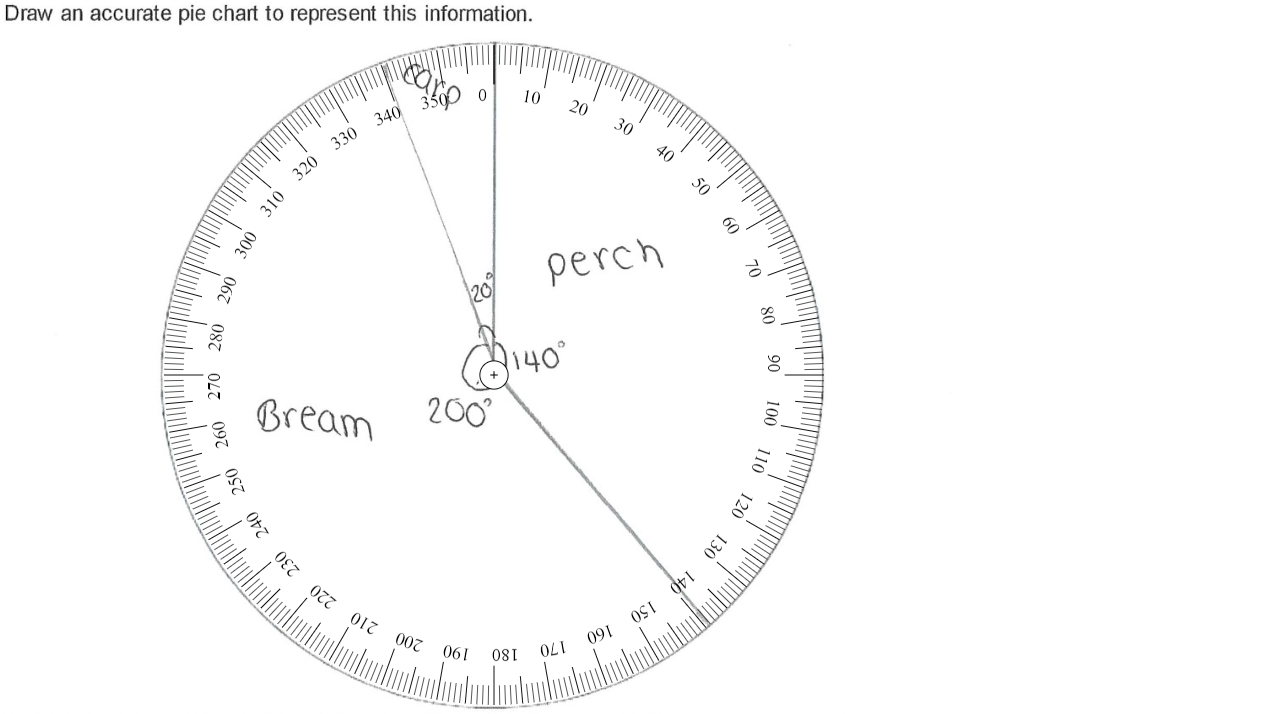
Measuring angles
There is a protractor tool to help you measure angles. Click the protractor button pie_chart_outline (or press P), and then click and drag to move it around the student's work. Use the [ and ] keys to resize the protractor.