Scan and upload
When students have completed their tests, scan them using a photocopier.
- First, remove any staples. The easiest way to do this is by tearing or cutting them off in the corner.
- Make sure there are no obstructions that might jam the photocopier, such as loose sheets of tracing paper or folded corners.
- Feed the whole stack of tests into the document feeder. If you are scanning a large quantity, it's best to split them into smaller batches – most copiers work best with a maximum of 100 pages at a time.
- Select the option to scan in "JPEG" format. You may also need to select "Double-sided". Then press "Scan".
- Watch the pages as they scan. Occasionally, the copier might feed two pages at once – if this happens, you will need to stop the scan and start again.
- At the end, the total number of scanned sides will usually be displayed. Check that this is a multiple of the number of pages in each test. For example, if it's a 12-page test and the total is 118 pages then you know a page must have been skipped.
- Most copiers will save the scans to a shared folder or send them to you by email.
Once the tests are scanned, you can upload them to MiniTest.
- Create the test if you have not already done so.
- Click "Upload".
- If your scans have QR codes with students' names, tick the "Identify students" box. Read more about identifying student names.
- Click "Choose files" and select the scans you would like to upload. We recommend that you select files in JPEG format, but you can also select a ZIP file containing JPEG images. This may be useful if you have used your email client's "Download all attachments" feature. PDF documents are also supported, but the uploads will take longer and you might lose image quality (the PDFs are converted to JPEG images before being uploaded).
- Keep the page open while the scans upload. This usually takes a few seconds, or slightly longer for large uploads.
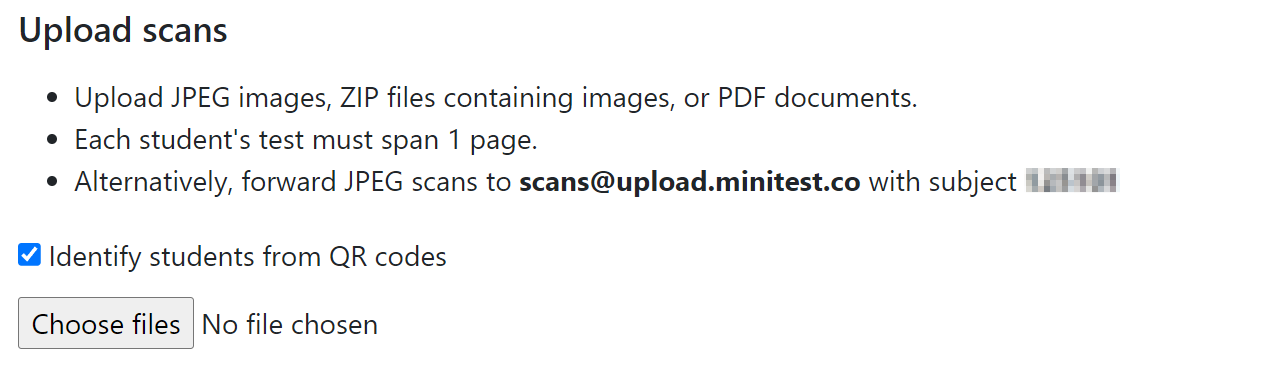
An alternative way of uploading scans is to forward the email received from your photocopier to [email protected]. Note that this method only works with JPEG images, and you need to set the email subject line to the code shown on the Upload page. If the email upload is successful, you will receive a confirmation email with a link to finish processing the scans. In some situations, you might not receive a response – this usually means that the email exceeded the server's size limit. In this case, you need to upload the files normally.